Replacing an Indramat HDS Drive
Upgrading or replacing a Rexroth Indramat HDS drive is a crucial step in maintaining operational efficiency across industrial environments. These legacy drives, when properly maintained or replaced, ensure machinery uptime and long-term system reliability.
At Wake Industrial, we help manufacturers identify when it’s time to upgrade their Indramat HDS drive and guide them through the replacement process with ease and precision.
What Are Indramat HDS Drives?
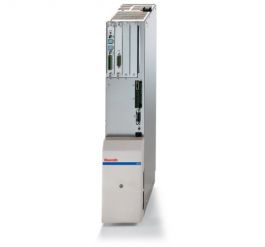
The Indramat HDS drive series, part of the DIAX04 platform, is known for its flexibility and ruggedness. Designed to pair with a wide variety of motors including MKD, MHD, 1MB, and 2AD HDS drives are found in applications such as:
-
CNC machining
-
Textile manufacturing
-
Printing and converting
-
Packaging lines
-
Robotics and automated handling systems
These drives are a backbone of precision motion control in many industries.
Signs It’s Time to Replace Your HDS Drive
Common Indicators of Drive Wear or Failure:
-
Unusual noises during operation
-
Intermittent fault codes
-
Reduced motor performance or torque
-
Overheating or power inconsistencies
Consequences of Delayed Replacement:
-
Prolonged machine downtime
-
Escalating repair costs
-
Production delays or output defects
Timely replacement can help you avoid serious disruptions and restore your system’s efficiency before a full breakdown occurs.
The Modular Advantage of the HDS Series
Understanding the DIAX04 Modular Architecture:
The DIAX04 family is modular, allowing for independent replacement of control sections, power modules, and interface cards without full system disassembly.
Benefits of Modularity:
-
Simplified repairs
-
Faster troubleshooting
-
Minimal system disruption
By replacing only the defective component rather than the entire drive you can extend the system's service life and reduce maintenance costs.
How to Replace an Indramat HDS Drive (Step-by-Step)
1. Safety First
-
Disconnect all power sources to the cabinet.
-
Use proper ESD protection and PPE.
2. Prepare Tools and Materials
-
Gather screwdrivers, torque wrenches, and multimeters.
-
Have the correct replacement HDS drive or module ready (e.g., HDS01.1-K015-D, HDS01.1-K025-R).
3. Remove the Faulty Drive
-
Document wire locations and connections.
-
Carefully unmount and remove the existing drive unit.
4. Install the Replacement Drive
-
Secure the new HDS unit in place.
-
Reconnect all cables based on your documentation.
5. Recommission and Test
-
Power on the system.
-
Run diagnostics and observe for any new fault codes or behavior.
-
Test the system under typical operating conditions to confirm full functionality.
Troubleshooting Common HDS Drive Faults
Frequent Error Codes:
-
F8022 – Encoder signal fault
-
E8260 – Communication timeout or feedback error
Diagnostic Tips:
-
Refer to the HDS manual for error code definitions.
-
Inspect connectors and feedback devices.
-
Swap modular cards if needed to isolate faulty components.
Understanding these error messages will help you avoid misdiagnosis and speed up the repair process.
For more information, contact PLG Automation:
Email: sales@plgautomation.com
Phone: 800-906-9271